Bootstrap Popover Placement
Intro
The versions
Bootstrap is one of the most useful and free open-source platforms to develop websites. The latest version of the Bootstrap platform is known as the Bootstrap 4.
Application of the Bootstrap 4
Using Bootstrap 4 you will establish your site now faster than ever. As well, it is comparatively extremely much simpler to apply Bootstrap to establish your website than other systems. Together with the integration of HTML, CSS, and JS framework it is one of the most leading platforms for web development.
Amazing elements plus tricks in Bootstrap 4
Some of the most recommended components of the Bootstrap 4 include:
• An improvised grid complex which makes it easy for the user to get mobile device responsive along with a fair level of ease.
• Various utility instruction sets have been incorporated in the Bootstrap 4 to promote uncomplicated studying for starters in the business of web site creation.
Things to keep in mind
Step 2: Rewrite your article by highlighting words and phrases.
Together with the launch of the brand new Bootstrap 4, the connections to the older version, Bootstrap 3 have not been totally renounced. The developers have guaranteed that the Bootstrap 3 does get periodic improve and problem resolve as well as improvements. It will be carried out even after the end release of the Bootstrap 4. Bootstrap 3 have not been totally cut off. The developers have assured that the Bootstrap 3 does get regular updates and bug fixes along with improvements.
Contrasts about Bootstrap 4 and Bootstrap 3
• The help for many web browsers as well as managing systems has been involved in the Bootstrap 4
• The total sizing of the font style is enhanced for comfortable observing and web site generation practical experience
• The renaming of several components has been accomplished to guarantee a faster and even more dependable web development method
• Through brand-new modifications, it is achievable to build a much more interactive website with minor efforts
Bootstrap Popover Example
And promptly let us access the essential topic.
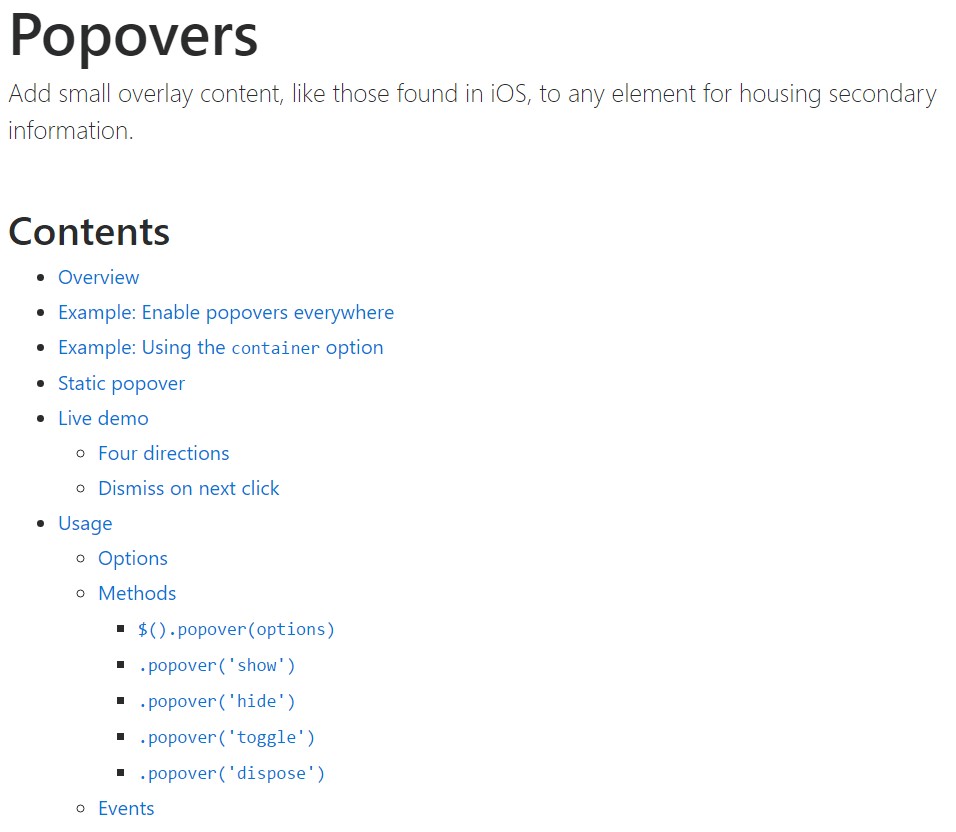
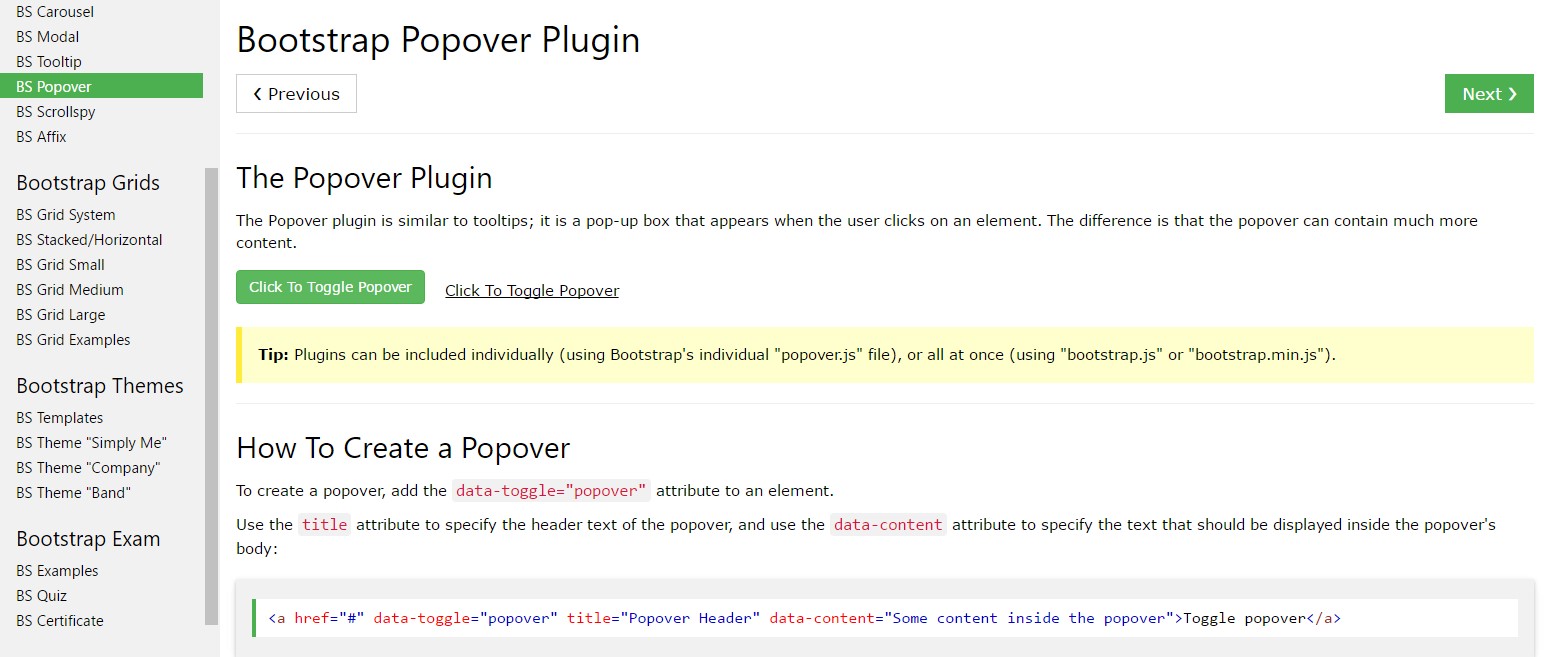
In case you like to add in special backup info on your site you can use popovers - simply add small-sized overlay content.
Ways to make use of the popover plugin:
- Bootstrap Popover Example lean at the Third party library Tether for installing. You must provide tether.min.js just before bootstrap.js in order for popovers to operate!
- Popovers demand the tooltip plugin as a dependence .
- Popovers are opt-in for effectiveness reasons, in this way you will need to initialize them by yourself.
- Zero-length
titlecontent- Establish
container:'body'- Activating popovers on hidden features will definitely just not do the job.
- Popovers for
. disableddisabledwhite-space: nowrap;<a>Did you understood? Wonderful, let's discover precisely how they work along with some examples. ( useful content)
You need to include tether.min.js prior to bootstrap.js in order for popovers to perform!
Good example: Set up popovers anywhere
One way to initialize all popovers on a webpage would undoubtedly be to pick out them by their
data-toggle$(function ()
$('[data-toggle="popover"]').popover()
)An example: Employing the container opportunity
Anytime you provide some looks on a parent component that interfere with a popover, you'll really want to indicate a custom made
container$(function ()
$('.example-popover').popover(
container: 'body'
)
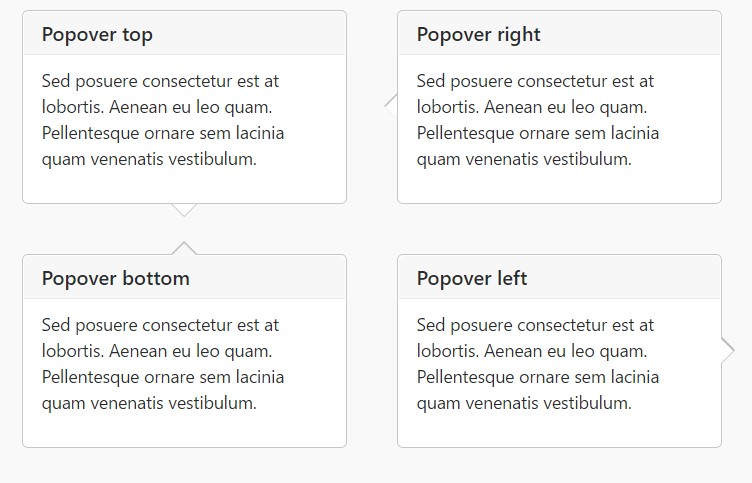
)Static popover
Four selections are available: top, right-handed, bottom, and left adjusted.
Live demo
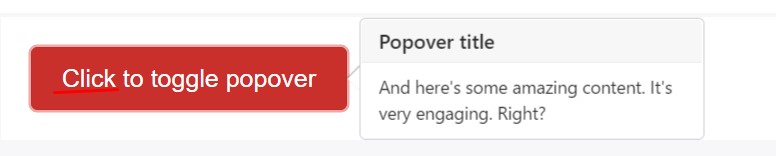
<button type="button" class="btn btn-lg btn-danger" data-toggle="popover" title="Popover title" data-content="And here's some amazing content. It's very engaging. Right?">Click to toggle popover</button>Four courses
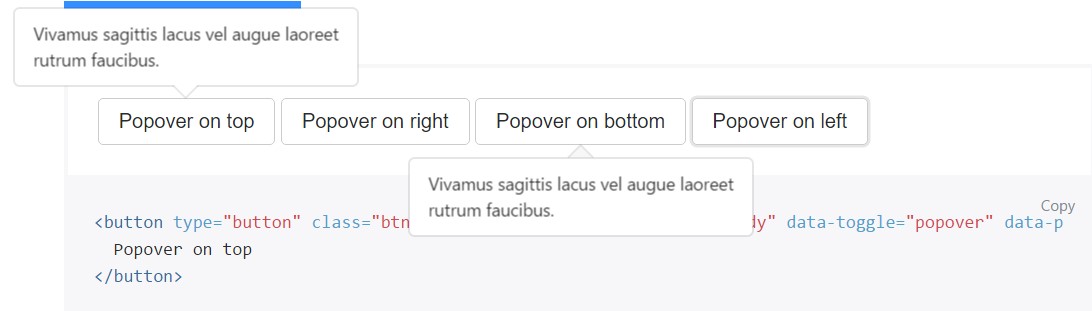
<button type="button" class="btn btn-secondary" data-container="body" data-toggle="popover" data-placement="top" data-content="Vivamus sagittis lacus vel augue laoreet rutrum faucibus.">
  Popover on top
</button>

<button type="button" class="btn btn-secondary" data-container="body" data-toggle="popover" data-placement="right" data-content="Vivamus sagittis lacus vel augue laoreet rutrum faucibus.">
  Popover on right
</button>

<button type="button" class="btn btn-secondary" data-container="body" data-toggle="popover" data-placement="bottom" data-content="Vivamus
sagittis lacus vel augue laoreet rutrum faucibus.">
  Popover on bottom
</button>

<button type="button" class="btn btn-secondary" data-container="body" data-toggle="popover" data-placement="left" data-content="Vivamus sagittis lacus vel augue laoreet rutrum faucibus.">
  Popover on left
</button>
Dismiss on next click
Use the
focusTargeted markup required for dismiss-on-next-click
For proper cross-browser and also cross-platform behavior, you must make use of the
<a><button>tabindex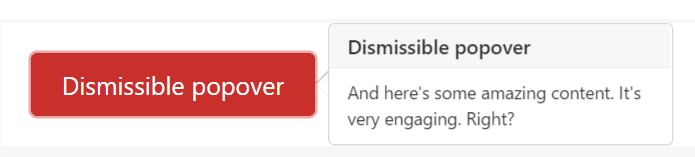
<a tabindex="0" class="btn btn-lg btn-danger" role="button" data-toggle="popover" data-trigger="focus" title="Dismissible popover" data-content="And here's some amazing content. It's very engaging. Right?">Dismissible popover</a>$('.popover-dismiss').popover(
trigger: 'focus'
)Usage
Set up popovers with JavaScript
$('#example').popover(options)Features
Selections may possibly be passed by using information attributes or JavaScript. For data attributes, attach the option name to
data-data-animation=""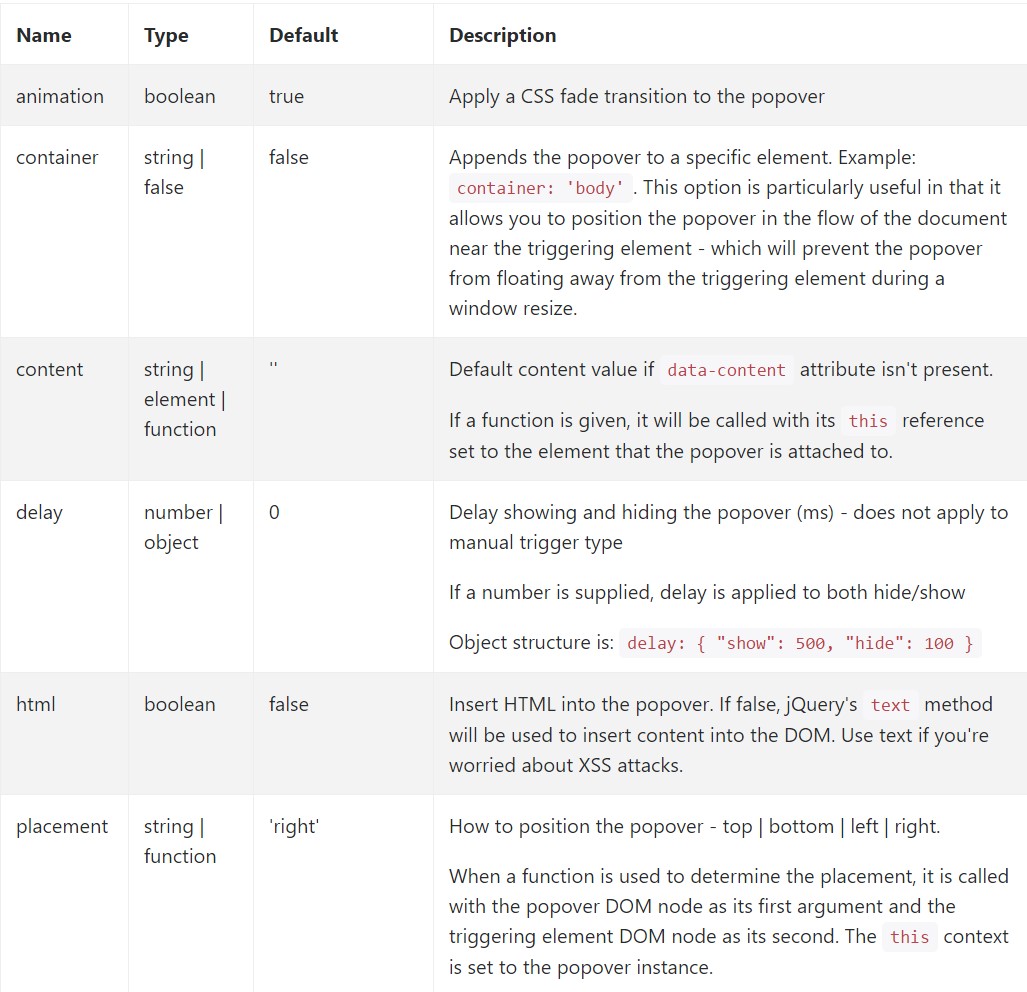
Details attributes for specific popovers
Options for separate popovers can alternatively be indicated with the use of data attributes, being described above.
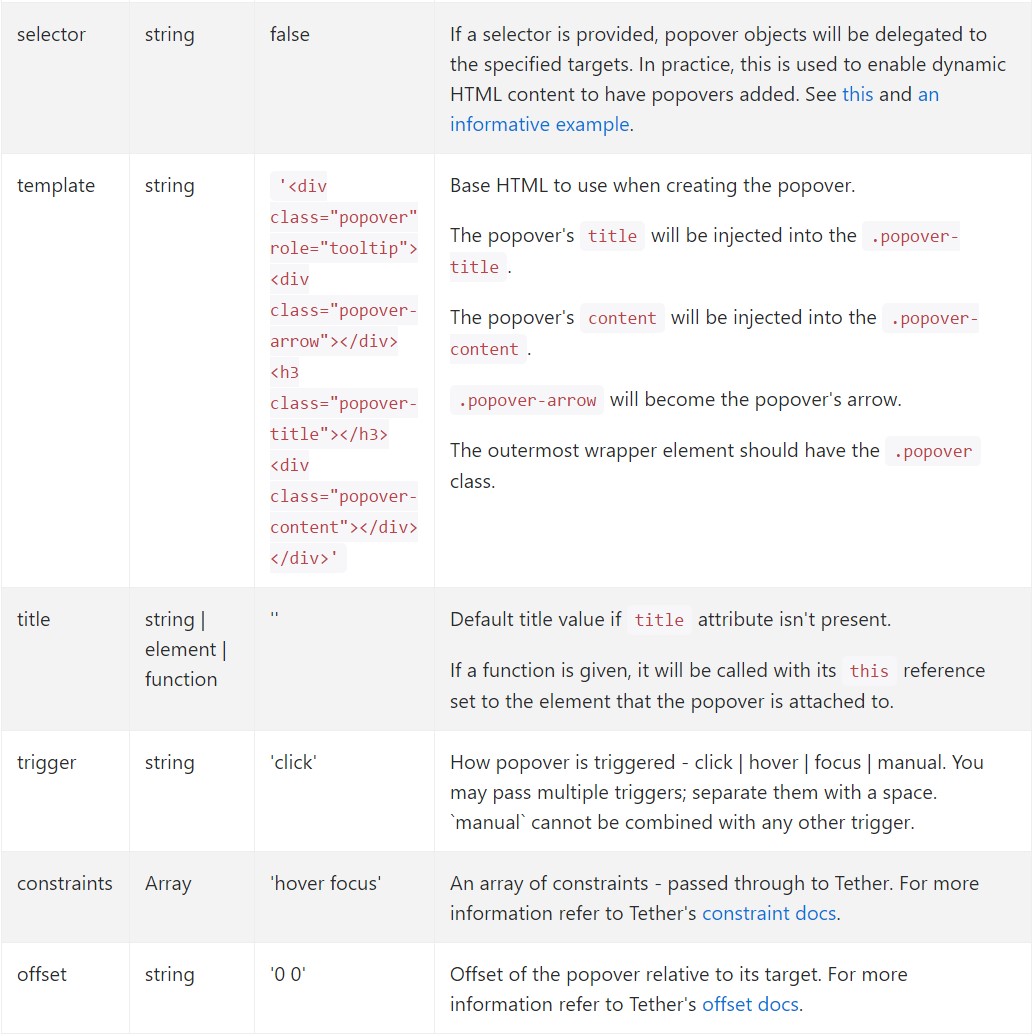
Options
$().popover(options)
Initializes popovers to the element selection.
.popover('show')
Shows an element's popover. Come back to the user prior to the popover has really been presented (i.e. before the shown.bs.popover
event happens). This is viewed a "manual" triggering of the popover. Popovers whose both the title and content are zero-length are never featured.
$('#element').popover('show')
.popover('hide')
Hides an element's popover. Returns to the user prior to the popover has actually been hidden (i.e. right before the hidden.bs.popover
activity occurs). This is looked at a "manual" triggering of the popover.
$('#element').popover('hide')
.popover('toggle')
Activate an element's popover. Goes back to the caller just before the popover has actually been revealed or disguised (i.e. before the shown.bs.popover
or hidden.bs.popover
activity happens). This is regarded a "manual" triggering of the popover.
$('#element').popover('toggle')
.popover('dispose')
Cover and gets rid of an element's popover. Popovers that use delegation (which are built working with the selector feature) can not be separately gotten rid of on descendant trigger elements.
$('#element').popover('dispose')
Events
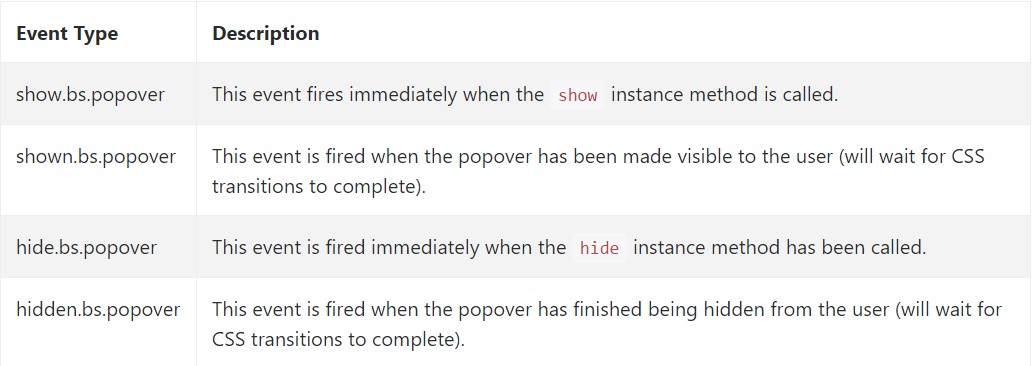
$('#myPopover').on('hidden.bs.popover', function ()
  // do something…
)
Examine a few video clip tutorials about Bootstrap popovers
Linked topics:
Bootstrap popovers formal documentation
Bootstrap popovers article
Bootstrap Popover problem

$().popover(options)
Initializes popovers to the element selection.
$().popover(options).popover('show')
Shows an element's popover. Come back to the user prior to the popover has really been presented (i.e. before the .popover('show')shown.bs.popover$('#element').popover('show').popover('hide')
Hides an element's popover. Returns to the user prior to the popover has actually been hidden (i.e. right before the .popover('hide')hidden.bs.popover$('#element').popover('hide').popover('toggle')
Activate an element's popover. Goes back to the caller just before the popover has actually been revealed or disguised (i.e. before the .popover('toggle')shown.bs.popoverhidden.bs.popover$('#element').popover('toggle').popover('dispose')
Cover and gets rid of an element's popover. Popovers that use delegation (which are built working with the selector feature) can not be separately gotten rid of on descendant trigger elements.
.popover('dispose')$('#element').popover('dispose')Events
$('#myPopover').on('hidden.bs.popover', function ()
// do something…
)Examine a few video clip tutorials about Bootstrap popovers
Linked topics:
Bootstrap popovers formal documentation
Bootstrap popovers article
Bootstrap Popover problem